Jeep Wrangler LJ Smittybilt Front Roll Cage Installation

Jun. 29, 2015 By Jim Brightly, KF7SCT
A full cage adds confidence to the driver and passengers alike, and it also improves the appearance of the Jeep.

You might think the Jeep’s OEM front bars will protect you if a condition of upset occurs, but you’d be wrong. Those two bars are strictly there to secure the windshield, not to protect the Jeep’s occupants. If you’re an avid Jeeper, one who takes the Class 4 trails rather than the four-lane highways or who explores the really back roads as often as possible, then you need the added protection of a front cage.

When getting started, plan on six to eight hours for the installation, and you should ask a friend to help. If your Jeep has a hardtop, you’ll need a friend to remove it anyway, so they can stick around to help with the install.

This Smittybilt photo shows off the full cage kit, which includes a crossbar above the tailgate, two diagonals over the rear seat, a front loop over the dash, and the center support above the center console. The kit’s bars are clamped to each other and the OEM bars (Photo: Smittybilt).

Each vertical support next to the A-pillar is equipped with a grab bar, which you’ll use often if your Jeep is lifted (Photo: Smittybilt).

In addition to adding protection for you and your passengers, the kit’s design also includes an upper plate that’s perfect for mounting a CB and/or ham radio. All you need to do is route a power line up the A-pillar on the windshield.

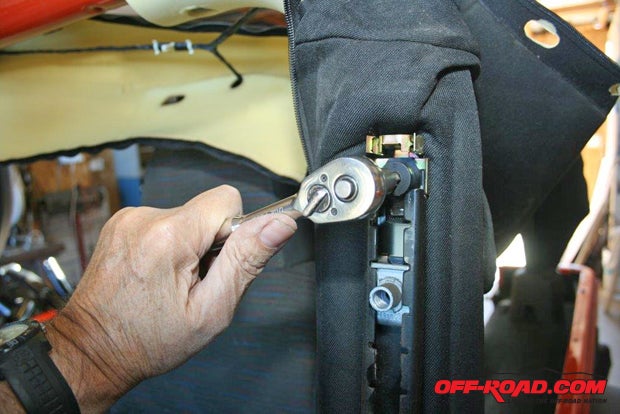
There is no welding necessary for this installation; it is a bolt-in installation and the Allen wrench for the bolts is included with the kit. You’ll have to do some slight trimming to the plastic surround on the windshield, and you may need a come-along to tweak the bars into place. Also, the instructions say slight modifications may be necessary to the padding covers. Almost all of the OEM padding covers will have to be either replaced or discarded—they won’t work with the cage in place.

We’ll be installing the kit on our LJ Wrangler, but Smittbilt also offers the kit for the current JK Wrangler platform as well.

Remove the top, either soft or hard, and the doors.

Remove all the padding covers and padding.

Remove the sound bar, if your Jeep is equipped with one. Carefully unplug the speakers and overhead lights.

Remove the bolts holding the front shoulder harnesses.

Remove the bolts securing the front side bars to the windshield frame.

There are two sizes of clamps in the kit, depending upon where they are installed and on what bar. Make sure you place them correctly as you loosely assemble the rollcage.

Prep each side of the front crossbar with a couple Allen bolts in the clamps.

Temporarily attach the front crossbar to the OEM side bars. Other than removing the top, this is the step that requires two people.

The front crossbar and center support bars are like a huge Tee. The center support bars will hang there.

Loosely attach the top loops to the center support bars. Adjust the front crossbar clamps on the side bars until the top loops fit onto the OEM crossbar. Loosely thread in all the Allen bolts in all of the clamps so far.

Install the two diagonals over the rear seat. Do not tighten any Allen bolt until they are all threaded into the clamps and the bars are in place, and then tighten all of them.

Once the diagonals are loosely secured in place, locate and mount the rear crossbar over the tailgate.You can tighten all the bolts once this rear crossbar is in place.

As you can see, the rear diagonals mate with the center support bars at the OEM center bar.

To mount the front support bars, you must remove the screws in this plastic panel.

Firmly pull the panel off. It is held in place with plastic studs.

Now you can remove the dashboard support bolts.

You’ll need to trim the plastic around the location that the side bars attach to the windshield frame.

Be careful not to over trim. Cut a little bit at a time and keep checking the fit until it’s finished.

Install the vertical support bars to the side bars.

After securing the vertical support bars to the lower A-pillar, install the lower crossbar just above the dash, and reinstall the plastic side panels.

Snap the plastic cover back on the OEM roll bar.

With the cage installed, we now have great protection for the trails.

Sources
Smittybilt
http://www.smittybilt.com/

Summit Racing
http://www.summitracing.com/


Off-Road.com Newsletter
Join our Weekly Newsletter to get the latest off-road news, reviews, events, and alerts!